Tuesday 6 November 2012

Run a form automatically when opening dynamics ax


create menu item for the form and call:

new MenuFunction(menuitemDisplayStr(YourMenuItemName), MenuItemType::Display).run(); 

Place this code to Info.startupPost() (if you want it to start when the client starts) or Info.workspaceWindowCreated() (if you want it to start every time new workspace is opened).

Thursday 18 October 2012

Microsoft Dynamics AX 2012 Eventing


Hello Friends,
One of the great new development improvements for Microsoft Dynamics AX 2012 is "Eventing"For most people, that have ever done any Object oriented development or programming, eventing is a concept that most familiar.
 You could do event handling in earlier versions too but in AX 2012, event handling is better than previous version. Now it uses the concepts of delegates, event handlers etc...
Everybody must have seen that there are very few customers that use out of the box AX without any customization's  I would say not even a single customer. All customers are required to customize AX to fulfill their business needs. Sometimes, customization's become so large that it becomes difficult to upgrade when Microsoft does make changes in the lower layer. Finally, it becomes cost/budget issue so event handling mechanism in AX 2012 will help to lower the cost of developing customization's and then upgrading these customization's.
Events are simple and powerful concept. In daily life, we encounter with so many events. Events can be used to support these programming paradigms.

1) Observation: Generate alerts to see exceptional behavior.
2) Information dissemination: To convey information to right people at right time.
3) Decoupling: Consumer doesn't need to know about producer. Producer and Consumer can be sitting           in totally different applications.

Terminology
AX 2012 events are based on .NET eventing concepts.

Producer: Object to trigger the event.
Consumer: Object to consume the event and process logic based on the event triggered.
Event: An action that needs to be triggered
Event Payload: Information that can go along with event.
Delegate: Definition that is passed to trigger an event. Basically, communicator between producer and consumer

Things to remember while using Events in AX2012

(1) Delegate keyword to use in delegate method.
(2) Public or any other accessibility specifier is not allowed in a delegate method.
(3) Delegate Method return type must be void.
(4) Delegate Method body must be empty.
(5) A delegate declaration can have the same type of parameters as a method.
(6) Event handlers can run only on the same tier as the publisher class of the delegate runs on.
(7) Handler can be implemented either in X++ or in managed code.
(8) Only static methods are allowed to be event handlers.
(9) Delegate method can’t be called outside class. Basically, events can’t be raised outside class in which     event is defined.
(10) Event handlers for host methods can use one of two parameter signatures:
          (i)   One parameter of the type XppPrePostArgs. Go through all the methods available in    XppPrePostArgs.
          (ii) The same parameters that are on the host method that the event handler subscribes to.

Now, let me show you how to use events in AX 2012.

1. Let’s create a class Consumer to create EventHandler (sendEmailToCustomer). This will be called once order is shipped so that email can be sent to customer to notify. It has to be static method
.


2. Now let’s create Producer class where this event (sendEmailToCustomer) is called using Delegates. Add delegate by right clicking on Producer class > New > Delegate.


3. Change its name to delegateEmail (you can have any name). Parameter should be same as event handler method (sendEmailToCustomer) i.e. of type Email. Notice it has no body and is a blank method.


4. Now drag and drop sendEmailToCustomer method from Consumer class to delegateEmail. 


5. Look at properties of EventHandler. You will notice it is pointing to Class Consumer and method sendEmailToCustomer 


6. If order is not shipped, I am creating another event handler (errorLog) in Consumer class to log error into error log.


7. Create another delegate method (delegateErrorLog) in Producer class to call this event handler (errorLog)


8. Drag and drop event handler (errorLog) in delegate method (delegateErrorLog) similar to step 4. 
9. Now let’s create main method in Producer class to ship order and let’s see how delegates can be used to trigger event handlers.


10. Suppose shipOrder method returns true. Now, if I run this main method, it should go into delegateEmail method and should trigger method sendEmailToCustomer. Let’s run and see the result. 11. Here is the result and it is as expected so it did trigger method sendEmailToCustomer.


11. Let’s suppose shipOrder method returns false. Now, if I run this main method, it should go into delegateErrorLog method and should trigger method errorLog. Let’s run and see the result.


12. Here is the result and it is as expected so it did trigger method errorLog.


13. Handlers can also be added/removed in x++. 
      Add Handler: It uses += sign

.

Remove Handler: It uses -= sign.


14. Now, let’s  use addStaticHandler in main method. If you see the code, it is calling addStaticHandler before calling delegate method. If we run it and see the result, it should send 2 emails.


15. Here is the result as expected.


7. Similarly if we use removeStaticHandler method instead of addStaticHandler before calling delegate method then it will remove handler and will not send any email.

So, you can see that with the use of delegates and event handlers, it is so easy to trigger events. Also, it will be easy and less time consuming to upgrade it. Suppose if delegates are called from standard methods while doing customizations then it will be so easy to upgrade if standard methods are changed in next release because only 1 liner code of calling delegate method needs to be rearranged and no changes will be required in event handler methods.

Use of Pre and Post event handlers
In AX 2012, any event handler method can dropped in other method. If the property “CalledWhen” is set to “Pre” then it becomes pre event handler. If it is set to “Post” then it becomes post event handler. Pre event handler is called before the method under which it is dropped and Post event handler is called after method ends. These are so powerful that event handler method can be created in new class and can be dropped in any standard or any other method without changing a single line of code and can be set as pre or post event handler as per business need. Suppose, before creating a customer in AX, business need is to do some business logic then logic can be written in pre event handler and can be dropped in insert method of CustTable. Similarly, if there is post logic to be written after customer is created then post event handler can be created and dropped in insert method of CustTable.

Let’s see how pre and post event handler methods can be created and used.

1. Let’s take same example. I added 2 event handler methods in Consumer class.


2. Drag and drop both these event handlers in method sendEmailToCustomer


3. Set property “CalledWhen” to Pre for EventHandler1 and Post for EventHandler2.


 4. Now let’s run main method of Producer class again and see the results. It should call EventHandler1 and then sendEmailToCustomer and then EventHandler2.


5. Here is the result as expected.


With use of events, it has opened so many doors and possibilities. Model architecture and events can be integrated which can help if multiple vendors are doing customizations in different models so that it doesn’t impact customizations of other models/vendors. Use of pre and post handlers is so powerful that it can be used without changing a single line of code in original method. Pre or Post handlers can be just dropped in the original method and will be called automatically before (pre handler method) or after (post handler method) original method.
Stay tuned for more on events. I am still exploring the possibilities using events in AX 2012. 


Tuesday 16 October 2012

Building Lookups - Using a form for lookup building

In numerous situations, standard, automatic, or even dynamic runtime lookups cannot display the required data. For example, it might be a lookup with tab pages or a search field. In such cases, Dynamics AX offers the possibility to create an AOT form and use it as lookup.
In this recipe, we will demonstrate how to create a lookup using an AOT form. As an example, we will modify the standard customer account lookup to display only active customers.

How to do it...

  1. 1. In AOT, create a new form called CustLookup. Add a new data source with the following properties:
    PropertyValue
    NameCustTable
    TableCustTable
    AllowCreateNo
    AllowEditNo
    AllowDeleteNo
    AllowCheckNo
    OnlyFetchActiveYes
    IndexAccountIdx

  1. 2. Change the form's following design properties:
    PropertyValue
    FrameBorder
    WindowTypePopup

  1. 3. Add a new Grid to the form's design:
    PropertyValue
    NameCustomers
    ShowRowLabelsNo
    DataSourceCustTable

  2. 4. Add a new StringEdit control to the grid:
    PropertyValue
    NameAccountNum
    DataSourceCustTable
    DataFieldAccountNum
    AutoDeclarationYes

  1. 5. Add another StringEdit control to the grid, right after AccountNum:
    PropertyValue
    NameName
    DataSourceCustTable
    DataFieldName

  1. 6. Add one more StringEdit control to the grid, right after Name:
    PropertyValue
    NamePhone
    DataSourceCustTable
    DataFieldPhone

  1. 7. Add a new ComboBox control to the end of the grid:
    PropertyValue
    NameBlocked
    DataSourceCustTable
    DataFieldBlocked

  1. 8. Override the form's init() method with the following code:
    public void init()
    
    {;
    super();
    element.selectMode(AccountNum);
    }
    
  2. 9. Override the form's run() with the following code:
    public void run()
    
    {
    FormStringControl callingControl;
    boolean filterLookup;
    ;
    callingControl = SysTableLookup::getCallerStringControl(
    element.args());
    filterLookup = SysTableLookup::filterLookupPreRun(
    callingControl,
    AccountNum,
    CustTable_ds);
    super();
    SysTableLookup::filterLookupPostRun(
    filterLookup,
    callingControl.text(),
    AccountNum,
    CustTable_ds);
    }
    
  3. 10. Finally, override init() of the CustTable data source with the following code:
    public void init()
    
    {
    Query query;
    QueryBuildDataSource qbds;
    QueryBuildRange qbr;
    ;
    query = new Query();
    qbds = query.addDataSource(tablenum(CustTable));
    qbr = qbds.addRange(fieldnum(CustTable, Blocked));
    qbr.value(queryvalue(CustVendorBlocked::No));
    this.query(query);
    }
    
  4. 11. The form in AOT should look like this:


    1. 12. Locate the extended data type CustAccount in AOT, and change its property:
      PropertyValue
      FormHelpCustLookup

    1. 13. To test the results, open Accounts receivable | Sales Order Details and start creating a new sales order. Notice that now Customer account lookup is different, and it includes only active customers:


      How it works...
      The newly created CurrencyLookup form will replace the automatically generated customer account lookup. It is recommended to append text Lookup to the end of the form name, so that lookups can be easily distinguished from other AOT forms.
      In order to make our form lookup looks exactly like a standard lookup, we have to adjust its layout. So, we set form design Frame and WindowType properties respectively to Border and Popup. This removes form borders and makes the form lookup like a true lookup. By setting the grid property ShowRowLabels to No, we hide grid row labels, which are also not a part of automatically generated lookups. Then, we create a grid with four controls, which are bound to the relevant CustTable table fields.
      Next, we change the data source properties. We do not allow any data change by setting AllowEdit, AllowCreate, and AllowDelete properties to No. Security checks should be disabled by setting AllowCheck to No. To increase performance, we set OnlyFetchActive to Yes, which will reduce the size of the database result set to only the fields that are visible. We also set the data source index to improve lookup performance.
      Now, we need to define which form control will be returned as a lookup value to the calling form upon user selection. We need to specify it manually in the form's init() by calling element.selectMode() with the name of the AccountNumcontrol as argument.
      In the form's run(), we simulate standard lookup filtering, which allows user to user * symbol to search for records in the lookup. For example, if the user types 1* into the Customer account control, the lookup will open automatically with all customer accounts starting with 1. To achieve that, we use the filterLookupPreRun() and filterLookupPostRun() methods of the standard SysTableLookup class. Both methods requires calling a control, which we get by using getCallerStringControl() method of SysTableLookup. The first method reads user input and returns true if a search is being performed, otherwise, false. It must be called before the super() in the form's run() and accepts four arguments:
      1. 1. The calling control on the parent form.
      2. 2. The returning control on the lookup form.
      3. 3. The lookup data source.
      4. 4. An optional list of other lookup data sources.
      The filterLookupPostRun() must be called after the super() in the form's run() and also accepts four arguments:
      1. 1. A result value from previously called filterLookupPreRun().
      2. 2. The user text specified in the calling control.
      3. 3. The returning control on the lookup form.
      4. 4. The lookup data source.
      The code in the CustTable data source's init() replaces the data source query created by its super() with the custom one. Basically, here we create a new Query object, add a range to show only active customers, and set this object as the new CustTable data source query. This ensures that there are no dynamic links from the caller form's data source.
      The value CustLookup in the FormHelp property of the CustAccount extended data type will make sure that this form is opened every time the user opens Customer account lookup.

Sunday 14 October 2012

X++ code to create a customized lookup on form

Override the lookup method on Formdatasource field(on which you want to show lookup) , and copy the following code to your method.
Comment the super() method in the lookup.

public void lookup(FormControl _formControl, str _filterStr)
{

SysTableLookup sysTableLookup; // systemclass to create //customlookup
Query query;
QueryBuildDataSource qbd;

;
sysTableLookup = SysTableLookup::newParameters(
tablenum(InventTable),
_formcontrol);

// Construct query on the table,
// whose records you want to show as lookup.
query = new Query();
qbd = query.addDataSource(tablenum(InventTable));
qbd.addRange(fieldnum(InventTable,ItemType)).value(SysQuery::value(enum2str
(ItemType::Item)));

// add the fields to the lookup list
sysTableLookup.addLookupfield(fieldnum(InventTable,ItemId));
sysTableLookup.addLookupfield(fieldnum(InventTable,ItemName));

// pass the query as parameter
// system will show the records in the lookup
// as per your query
sysTableLookup.parmQuery(query);
sysTableLookup.performFormLookup();

}

Wednesday 29 August 2012

Sales orders – commissions in Ax 2009


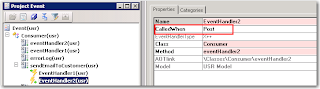
Setup Commission posting
Microsoft Dynamics® AX2009 calculates sales commissions at the sales line level upon invoicing a sales order.
The Commission posting form is used to specify a general ledger account for a commission posting to be debited only during an invoice update, and also as an offset account that is credited. Click Navigation Pane node: Accounts receivable -> Setup -> Commission -> Commission posting. Select ‘Commission’  to setup debit account and ‘Commission offset’ to setup credit account.
Customer groups for commissions
When calculating the commission of a sales line Microsoft Dynamics AX 2009 searches for the related sales representative, item, and customer combination set up in the Commission calculation form. Groups of sales representatives, items, and customers can also be set up in Commission relationships in the Commission calculation form.
Use Commission customer groups (CCG) to integrate groupings of customers into the calculation of commission transactions for sales orders. Notice that CCGs are not necessarily connected to customer groups. Click Navigation Pane node: Accounts receivable -> Setup -> Commission -> Customer groups for commission.
For a commission to be calculated with regard to a specific CCG, the CCG must be associated with a sales order. A CCG can be set up on:
- Customer – Specify the CCG on the Sales order tab in the Customer commission group field. This defaults to the sales order when creating a sales order with this customer.
- Sales order – Specify the CCG on the Setup tab in the Customer group field. Notice that a setting in the sales order overrides the setting from the Customers form.
To link CCG with the customer, click Navigation Pane node: Accounts receivable -> Customer Details. Switch to the Sales order tab on the Customers form. Change Commission Customer Group.
To link sales order with the CCG, click Navigation Pane node: Accounts receivable -> Sales Order Details.  Switch to the Setup tab and select ‘Sales group’, select CCG. If you already have selected the group for the customer, it will be populated automatically.
Commission item groups
Use Commission item groups (CIG) to integrate combinations of items into the commission calculation. Notice that although CIGs are completely independent of ordinary item groups Inventory management > Setup > Item groups it might be desirable to group items into CIGs under similar premises. You can’t change CIG in the order line.
To check existing Item groups, open Inventory management -> Setup -> Item groups.
To create new CIG Accounts receivable -> Setup -> Commission -> Item groups.
To link items with CIG, click Navigation Pane node: Inventory management -> Item details, switch to the General tab on the Item form.
Commission sales group
The purpose of grouping employees is broader than the purpose of grouping customers and items for commission agreements. Within the Commission sales group (CSG) is the specification of which employees may receive a commission when a customer associated with the relevant sales group buys certain items.
Click Navigation Pane node: Accounts receivable -> Setup -> Commission -> Sales groups.
Open Sales rep. form. to setup sales representatives (they need to be in the employee table).
You can allocate percentages of both less than 100% and more than 100%. If the amount is more than 100%, a warning message appears. However, the system correctly calculates the amount if this warning is ignored and an over allocation is required.
You can also associate employees with a sales group by clicking Human Resources > Employee Details. Select an employee and click Commission, select the sales group to attach the employee to.
Click Navigation Pane node: Human Resources -> Employee Details. Click the Commission -> Sales groups menu button.
The same effect as creating a Table relation for a sales rep can be created by only attaching one salesperson to the CSG (Contact).
To integrate CSGs into the calculation of sales order commissions, specify a CSG at one of the following levels:
- Customer – Specify the CSG on the Sales order tab in the Sales group field. This defaults to the sales order when creating a sales order with this customer.
- Sales order – Specify the CSG in the Sales group field. This overrides the setting specified on the customer.
- Sales order line – Specify the CSG in the Sales group field. This overrides the customer and sales order settings.
Commission calculation
Click Navigation Pane node: Accounts receivable -> Setup -> Commission -> Commission calculation.
Go to the Setup tab, specify the following options:
  • The period the commission calculation is valid.
  • When commission calculation occurs: Before line discount, After line discount or After the total discount.
  • Whether the commission calculation is based on the contribution Margin or on Revenue earned for the sales order
  • In the Find next field, specify whether Microsoft Dynamics AX 2009 is to continue searching for more commission agreements for a salesperson. If this option is not selected, any agreements on the Group or All levels, for example, will be suppressed.  Microsoft Dynamics AX 2009 searches to find whether there are employees associated with a Sales group who are to receive a commission.  It will accumulate commissions for all possible level. The search for a commission calculation agreement moves from specific relations to general – all relations:   Table level, Item and Customer combination;  Group level combination of Item and Customer combination; - All – which is the general level.
  • If during the search a specific table relation exists, this overrides a commission calculation setup at the group level and in the same manner as a group setting overrides a general All setting.
View commission transactions
To see created commission transactions, click Navigation Pane node: Accounts receivable -> Customer Details. Click the Inquiries -> Invoice menu button. Commission -> Commission transactions menu button.
To see all of commission transactions posted for employee, click Navigation Pane node: Human Resources -> Employee Details. Click the Commission -> Commission transactions menu button.
Source: Dynamics Ax training materials.